ADS
With ads, we support most of the datatypes, also nested structs and arrays. The mapping we need to specify is the symbol name of the variable, struct, tcCOM object,... Ads is notification based and the max sample freq is 1000 Hz. Default, the cycle time of on change is 2 ms, if you want to have a faster or slower cycle time (slower cycle time results in a lower system load) you can specify the cycle time in the timer field of the variable. This will override the 2ms default cycle time. e.g.
| Type | Example mapping | Output database fieldnames |
|---|---|---|
| Single var | Global.HoofdVariabel1 | Variable name |
| Full array | Global.ArrayTest | Varname_ArrOrStruct[0], Varname_ArrOrStruct[x] |
| Single element in array | Global.ArrayTest[1] | Variable name |
| Full struct | Global.StructTest | Varname_StructTest_ElementName1, Varname_StructTest_ElementNameX |
| Single element in struct | Global.StructTest.elementName | Variable name |
Special data types
NonFlattedArray and NonFlattedStructArray
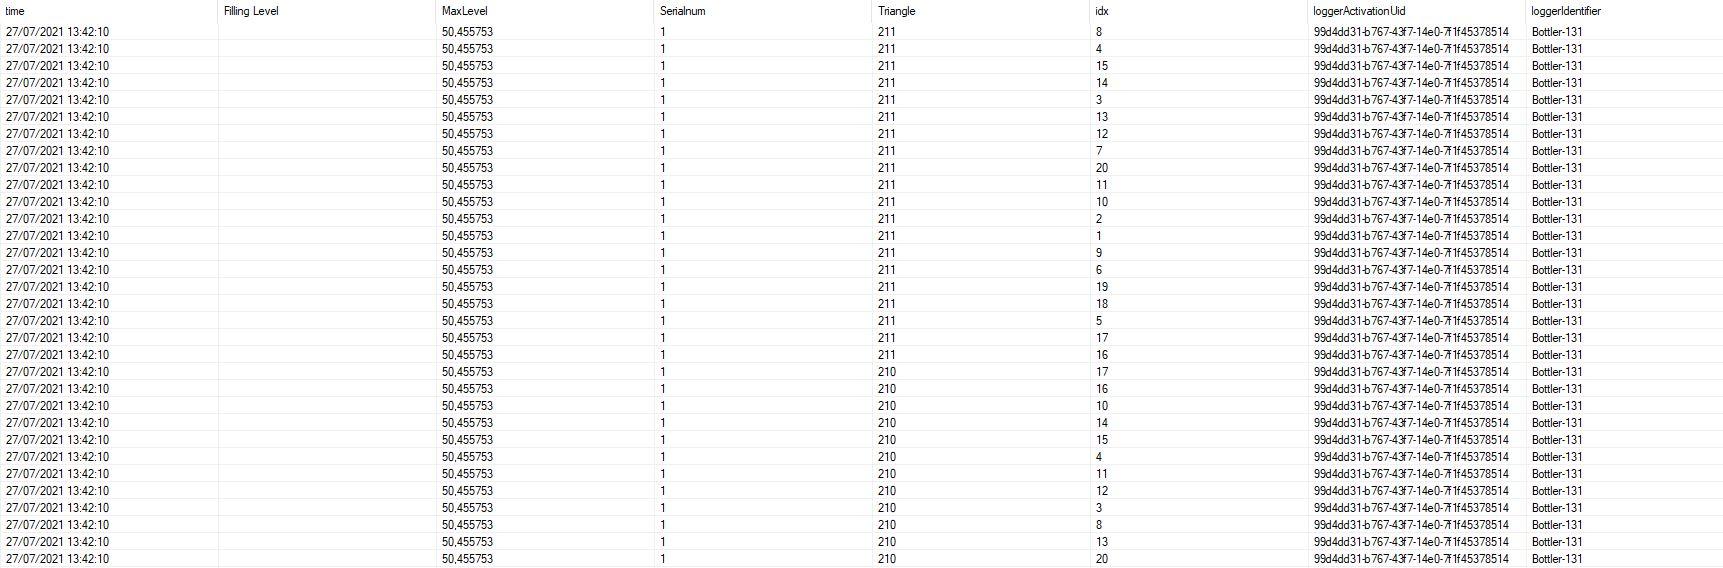
When editing a variable, there are two additional data types for ADS only, NonFlattedArray and NonFlattedStructArray. In tags, we have stated that when using tag value in the mapping for an array, Capture generates a new variable for each index. This is not a good idea when you want to log very large arrays. The solution is to use a NonFlattedArray type, this will generate a new row in the database for each index instead of a column. The two pictures below is an example array that uses NonFlattedArray and how the data is stored in the database. 
 The following pictures is the situation where you would use the auto type.
 You can also use NonFlattedStructArray when you want to log an array of structs.
For new projects, use type NestedObject.
NestedObject
The NestedObject type allows for more fine-grained control over how database columns are generated and which data is retrieved. When using NestedObject ADS Browser V2 is used as default.
When using the NestedObject type, array values will automatically be pivoted to one column and one extra column per index. So values myArray[0], myArray[1], myArray[2] will be stored in the same column, but with a tag column containing the values 0, 1, 2. Which indexes gets pivoted can be configured with the custom setting PivotedArrayIndexes. This is an integer-array with the positions of the array indexes that need to be pivoted. When set to null (the default), all indexes are pivoted. When set to an empty array, no indexes are pivoted. Set to [0, 4] to pivot the first and fifth array index.
The column/field name of points are by default VariableName_RelativeMapping. RelativeMapping is the ADS mapping relative to the mapping of the variable. This can be modified with the custom options.
All custom options:
| Option | Value type | Example | Description |
|---|---|---|---|
| FieldName | string | "FieldName": "MyValue" | Set this property to override the generated field name |
| FieldNamePrefix | string | "FieldNamePrefix": "MyValue" | Set this property to override the first part of the generated field name (instead of the variable name). It can be set to an empty string to only use the relative mapping as field name. |
| AddVariableSourceTag | boolean | "AddVariableSourceTag": true | If true, a tag column will be added with the name of the variable. |
| AddVariableSourceField | boolean | "AddVariableSourceField": true | If true, a field column will be added with the name of the variable. |
| AddMappingSourceTag | boolean | "AddMappingSourceTag": true | If true, a tag column will be added with the full mapping of the point. |
| AddMappingSourceField | boolean | "AddMappingSourceField": true | If true, a field column will be added with the full mapping of the point. |
| PivotArrayIndexes | int[] | "PivotArrayIndexes": [0] | Define the positions of the indexes that need to be pivoted. |
| Debug | boolean | "Debug": true | Set to true to generate detailed logs for this variable. |
| MaxDepth | integer | "MaxDepth": 2 | See Limit ADS object exploring |
| StopExploringAtPaths | string[] | "StopExploringAtPaths": ["^.*UnnecessaryMapping"] | See Limit ADS object exploring |
| AllowedMappings | string[] | "AllowedMappings": ["^.*InterestingMapping"] | See Limit ADS object exploring |
TwinCat ADS router
If Capture is installed on a non Beckhoff target, the Twincat XAR runtime should be installed on the target in order to be able to communicate with the Beckhoff target. After installation, following steps should be executed:
Add a route
In order to be able to communicate with the remote target, a route to the target is needed: 1. Expand the little arrow on the right of your windows taskbar and click the TwinCat icon. ![]() 2. Click Router and Edit Routes
2. Click Router and Edit Routes 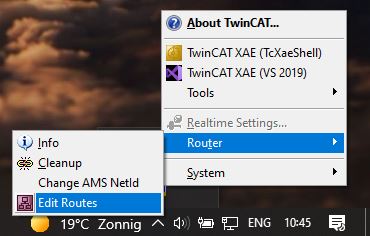 3. Then you get a popup window, on the bottom left, click Add Route
 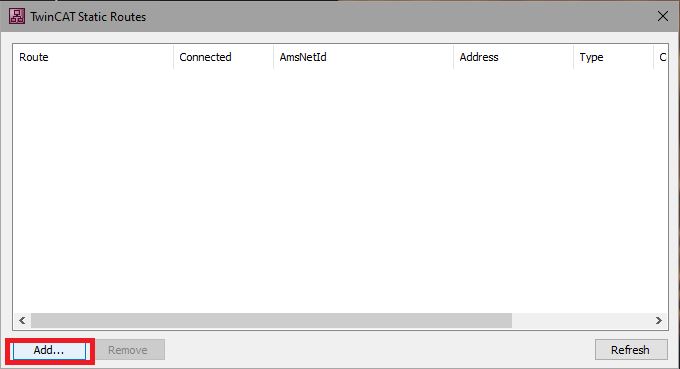 4. Now enter the IP-Address of the plc and click Enter Host Name / IP
 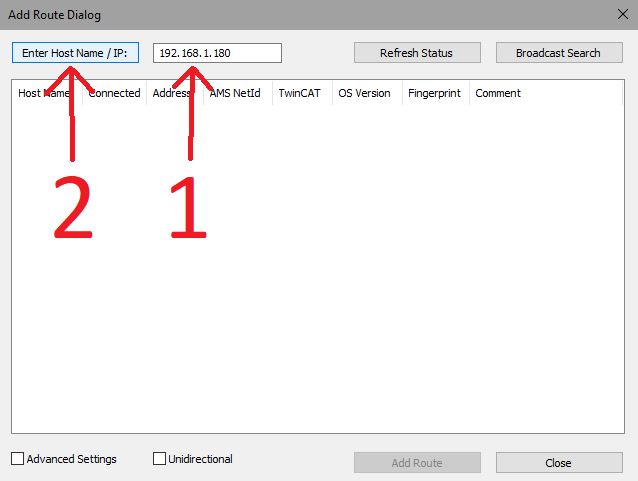 5. Click the added line and then Add Route
 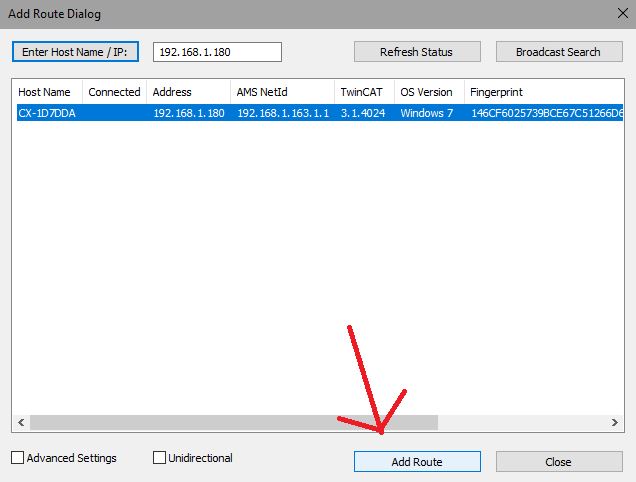 6. Here you can enter the credentials of the plc and proceed with the okay button
 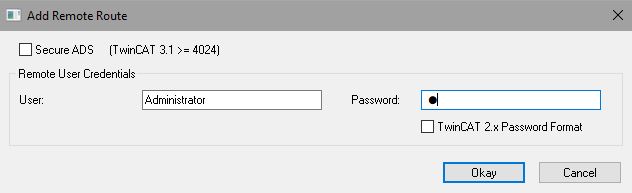 When you now go back to the TwinCAT Static Routes page, you will see your route in the list. There you can read your AmsNetId that can be used as the address for the device configuration.
 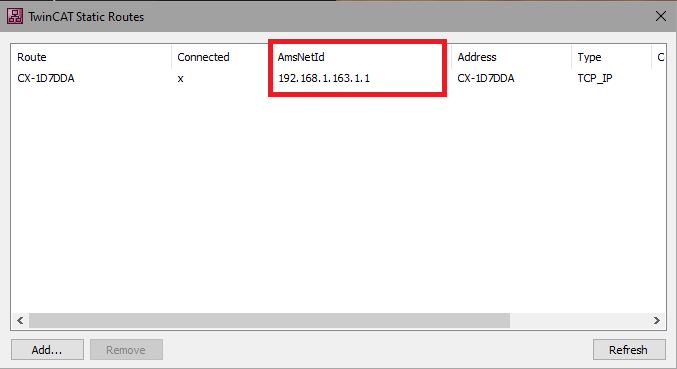 .
.
Get the mappings for your variables
You can find the mapping of your variables in your TwinCat project. This example shows one of our projects but the general structure should be very similar. After opening your project, to the left follow the path your_project_name -> PLC -> Main -> Main Project -> GVLs 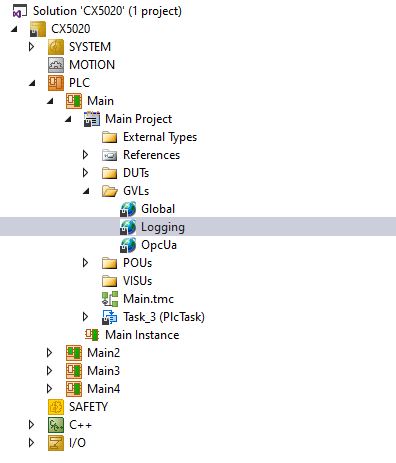 Once you click on one of your variable list, you will see all the variables in the center of the window. The Mapping that will be used in device configurations is variabe_list_name.variable (e.g. Logging.FillingLevel)
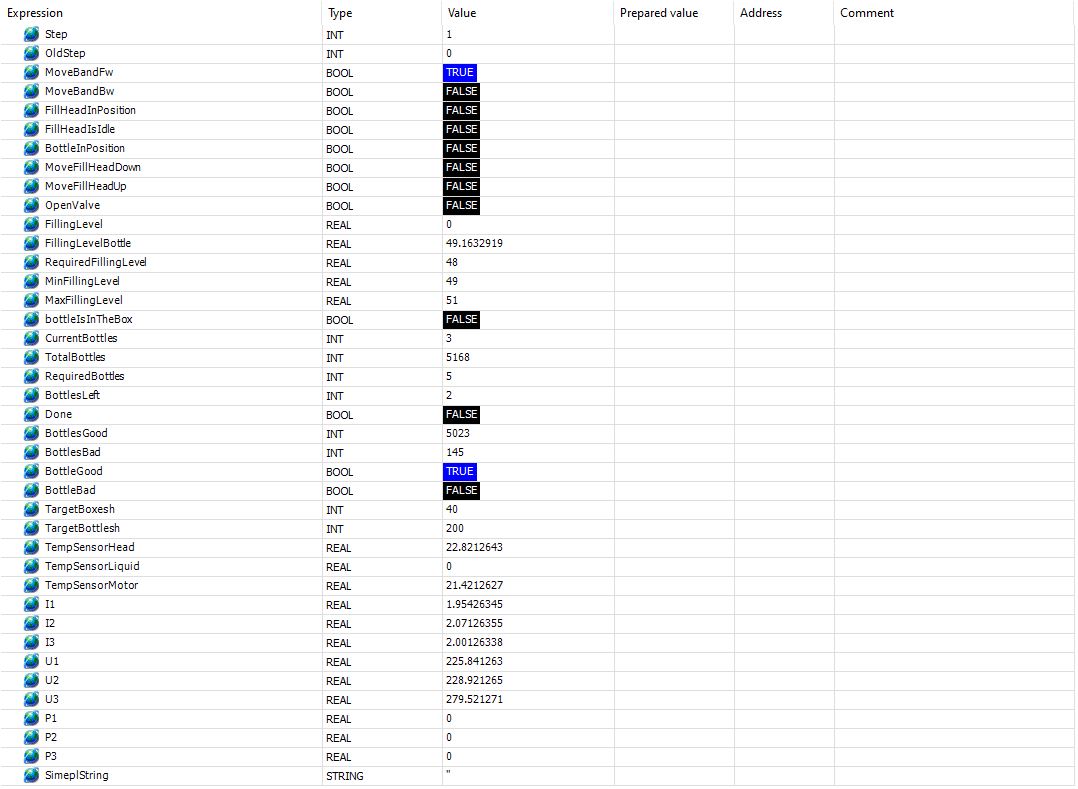
 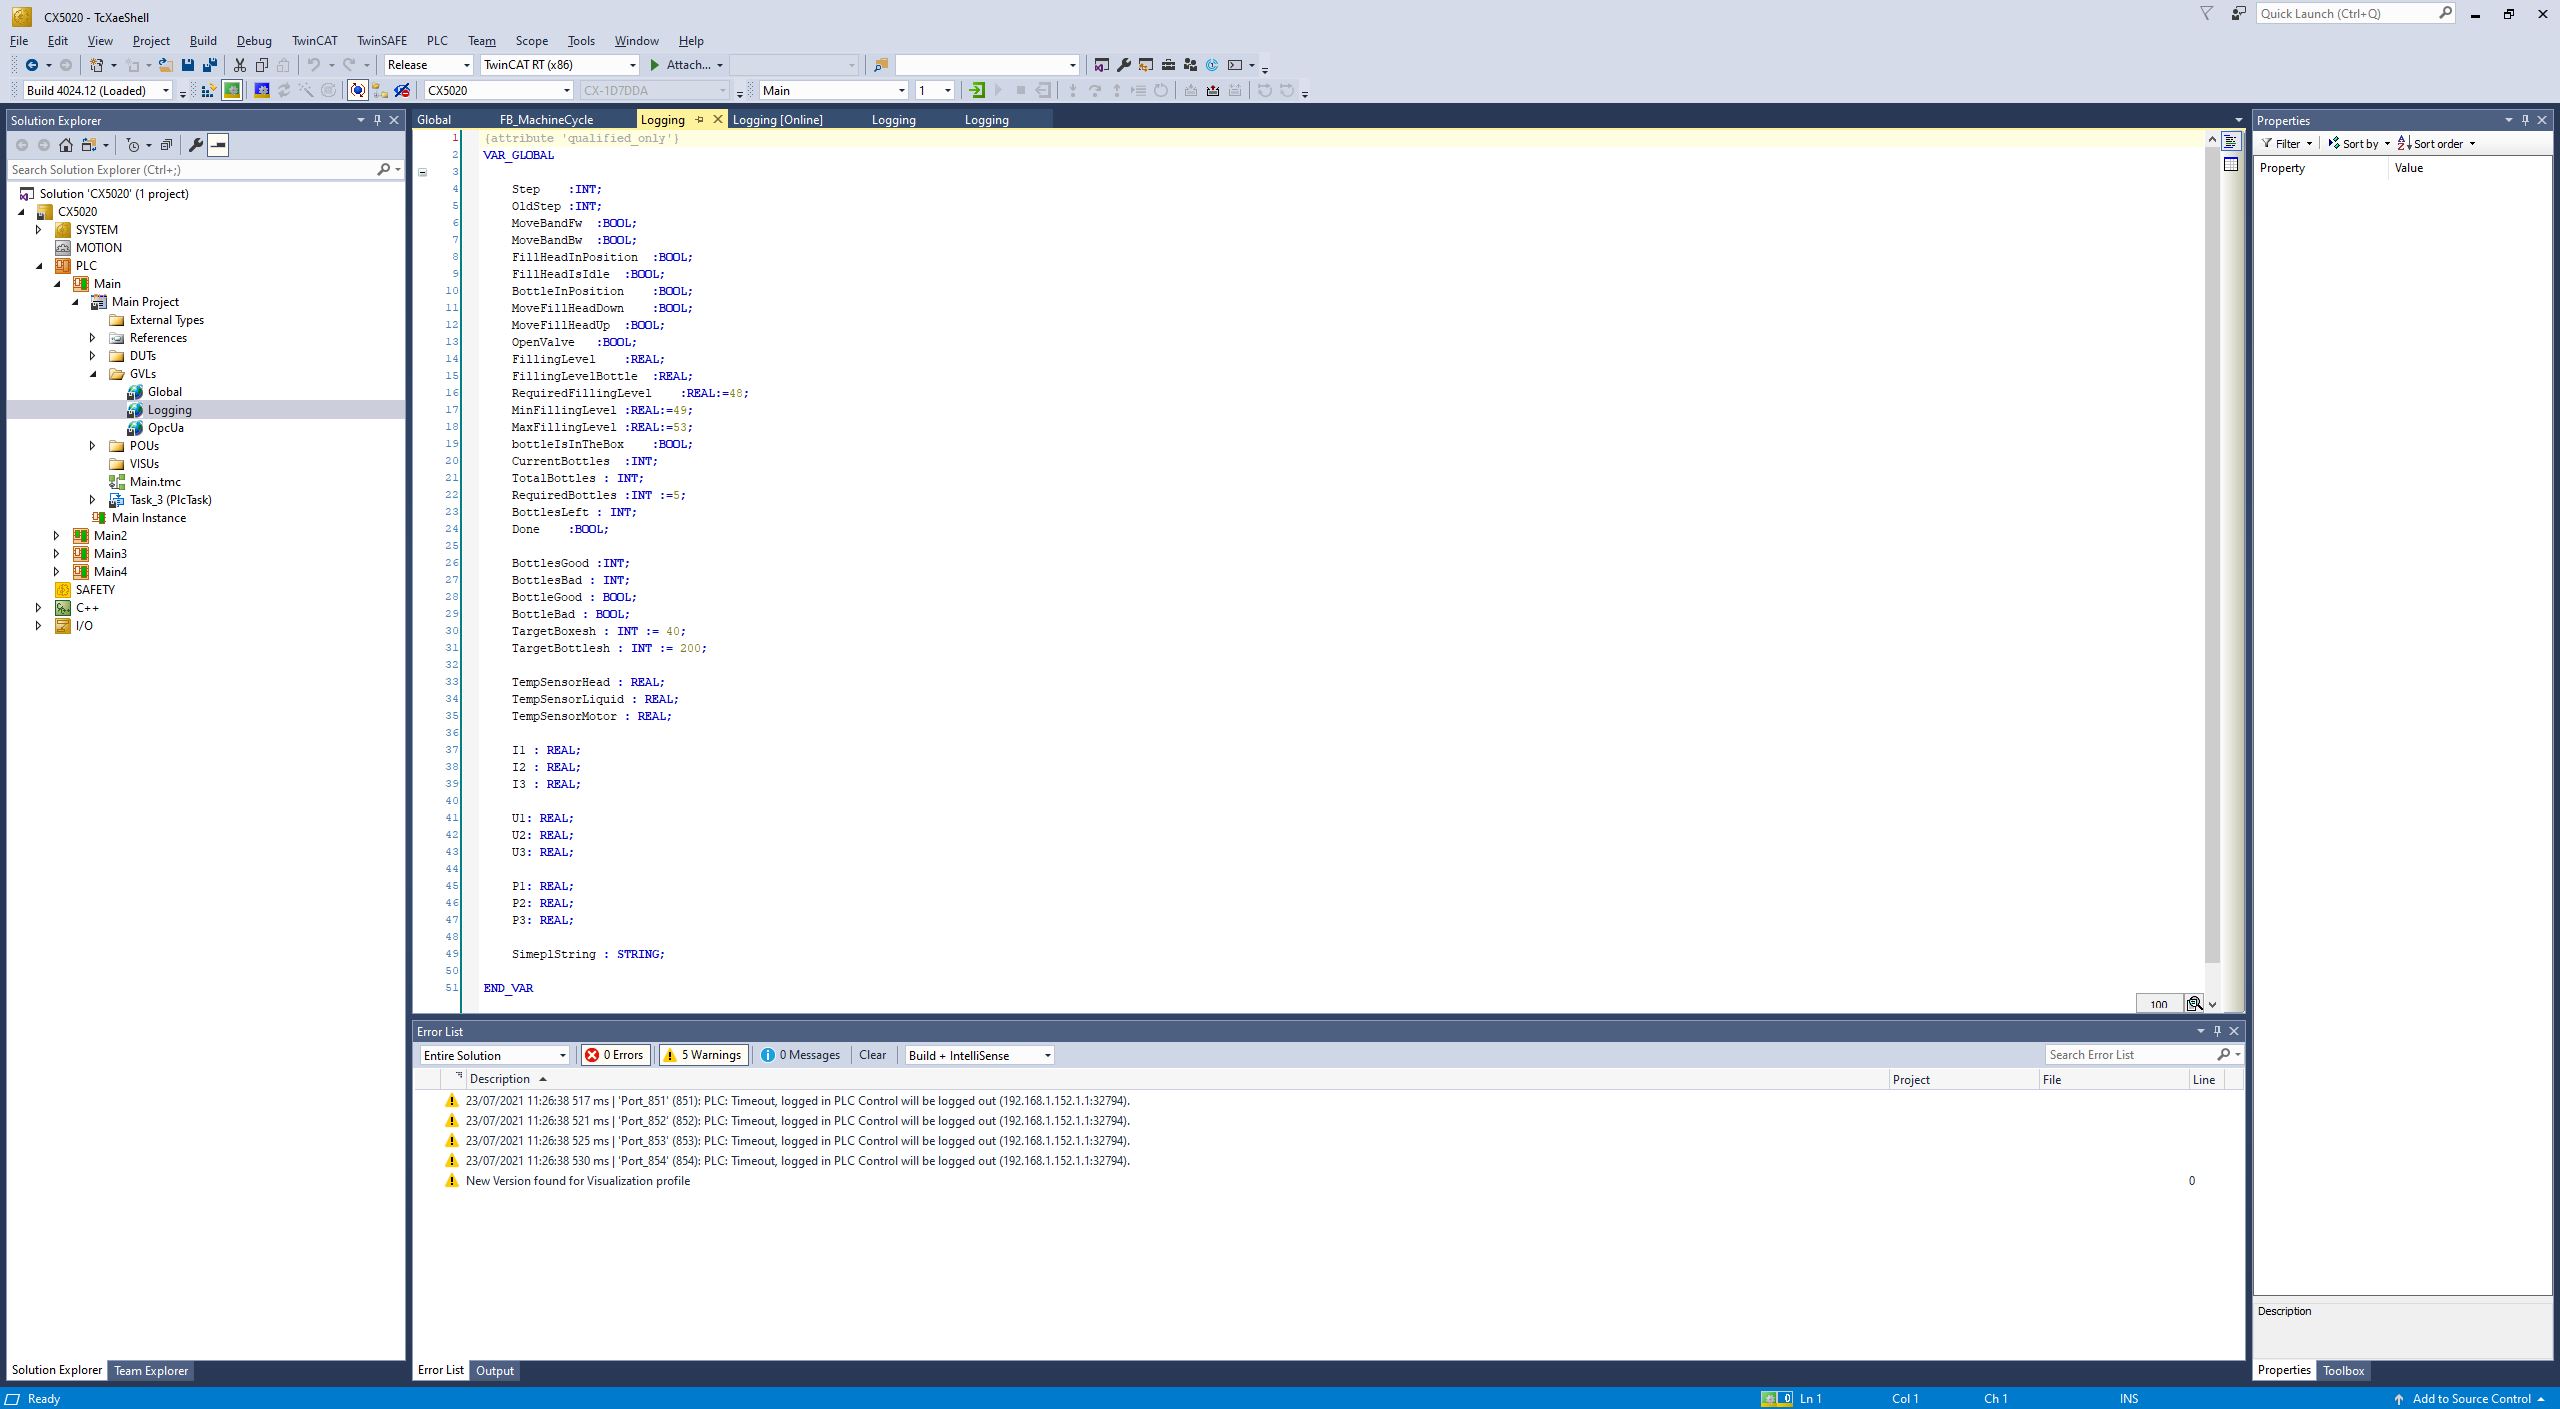 (Tip) If you want to see live data in TwinCat, click the green arrow in door icon at the top.
Limit ADS object exploring
Sometimes you don't want to collect the full ADS object. Limiting what data is collected improves performance and storage costs. There are several options to limit what is collected from an ADS object. These can be configured in the custom config of the ADS variable: Click the three dots next to a variable, and then the Custom settings button. In the pop-up enter the JSON to set the custom configuration for this setting.
MaxDepth: Defines the maximum exploration depth (counting members or array indexers).StopExploringAtPaths: An array of full paths or regex patterns (starting with a '^') that specify where exploration should stop. Note that each element in the mapping is checked: first grandparent, then grandparent.parent, then grandparent.parent.child.AllowedMappings: An array of full mappings or regex patterns (starting with a '^') that specify which mappings are allowed. This is checked after exploring the full object (or after being stopped by an entry inStopExploringAtPaths).
Examples:
Stop exploring at a depth of 2:
{"MaxDepth":2}
Stop exploring at a specific mapping:
{"StopExploringAtPaths":["Parent.Child.GrandChild"]}
Don't collect Parent.UnwantedChild, or any GrandChild:
{"StopExploringAtPaths":["^.*\.GrandChild", "Parent.UnwantedChild"]}
This functionality is available since Capture Edge 2.1.8.
ADS Browser versions
Since Capture Edge 2.1.8 a new ADS browser version (V2) is available. The ADS browser is the component that browses an ADS object to detect which values are available to subscribe to. For backwards compatibility ADS browser V1 is still the default. To enable V2, in the custom settings of the connection or the variable set: "BrowserVersion": 2
When using type NestedObject, the BrowserVersion is 2 by default.
ADS browser V2 can browse objects more in depth (unlimited levels) and supports multi-dimension arrays.