Service tool (Deprecated)
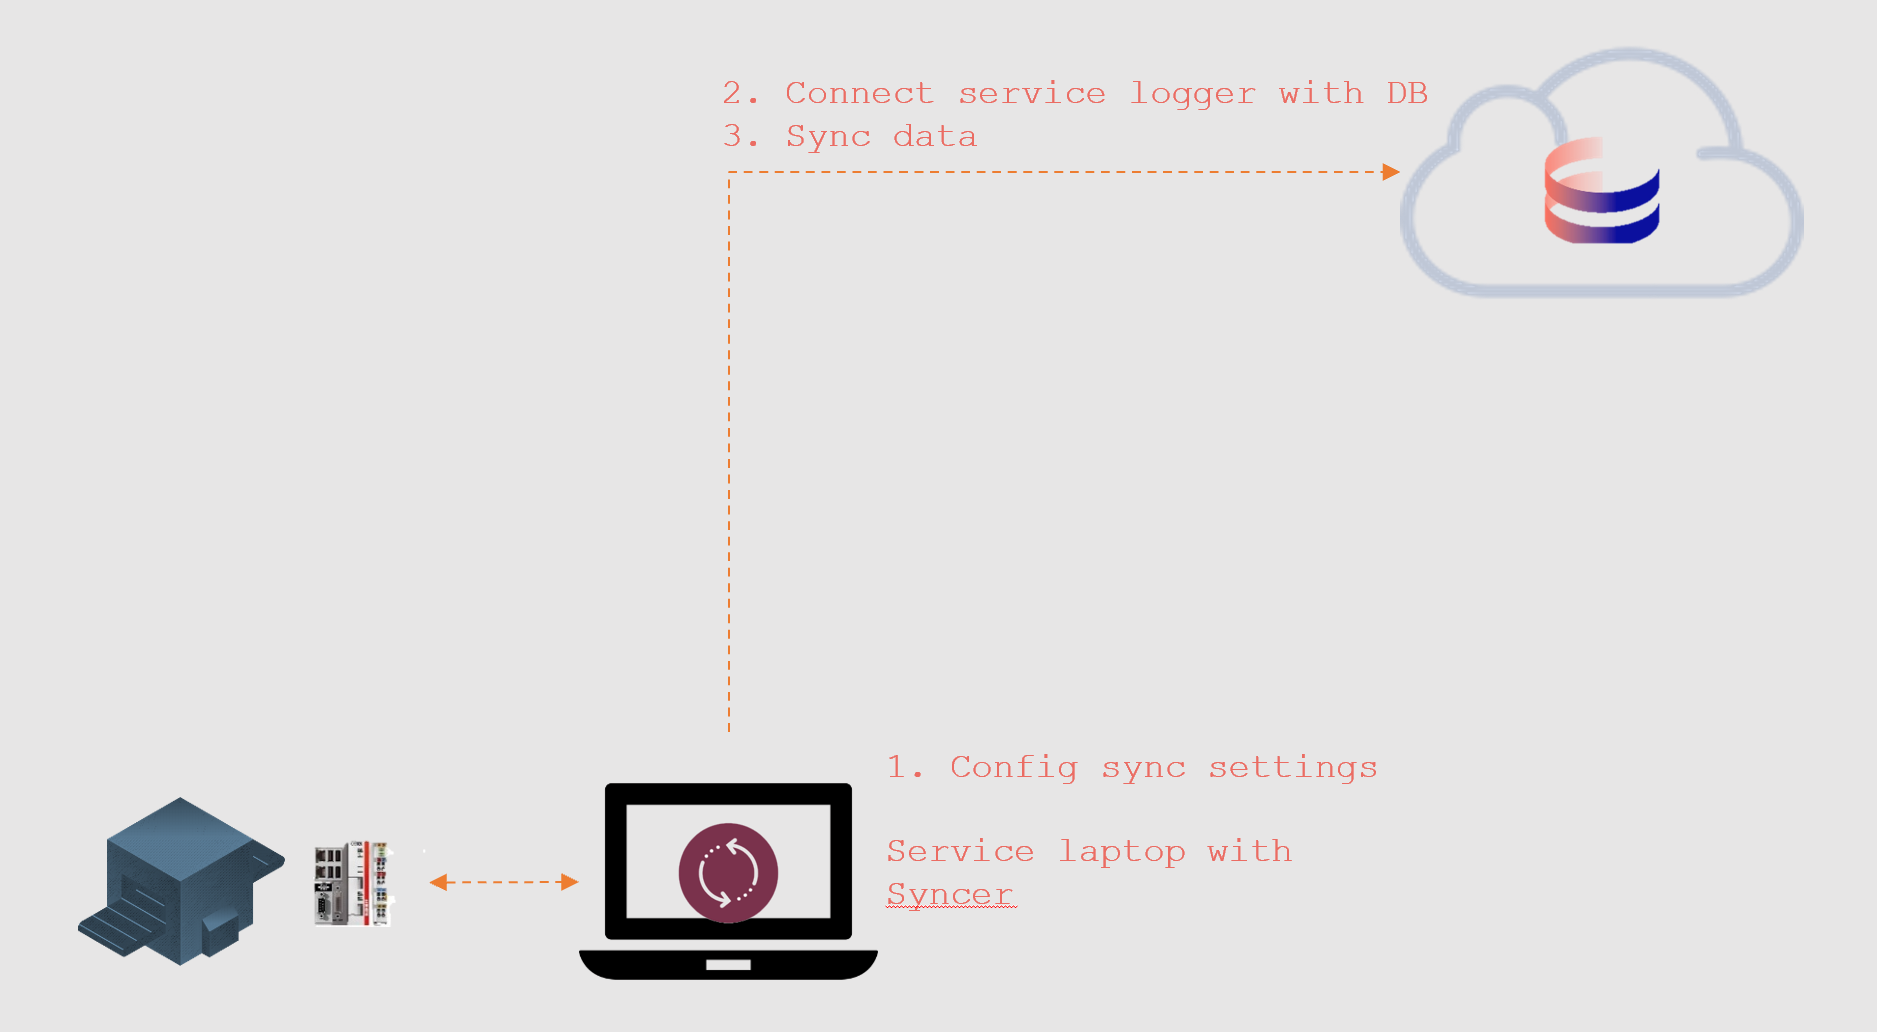
The Capture service tool is a Windows desktop application which can be used to sync the data from offline loggers to the Capture Cloud. The tool is able to create a backup of the target database in its own database. Once the service laptop has access to the internet, the tool is able to sync the data to the cloud via the Capture syncer application.
Installation
The installer contains only the necessary components to run the capture service tool
- Service tool desktop app
- Syncer
- Cloud Manager
- InfluxDb
- asp.net core runtimes
The installer package contains the capture installer executable and an optional default configuration file.
CaptureServiceToolInstaller │ Capture_Service_Tool_V1.0.0.exe │ Config.json
It is possible to download the installer and default Config (or a selected one) from the Docs section in the cloud platform (capture-vintecc.com). Selecting Default as config will generate an empty config with your company name already filled in. (based on the company of the logged in user) 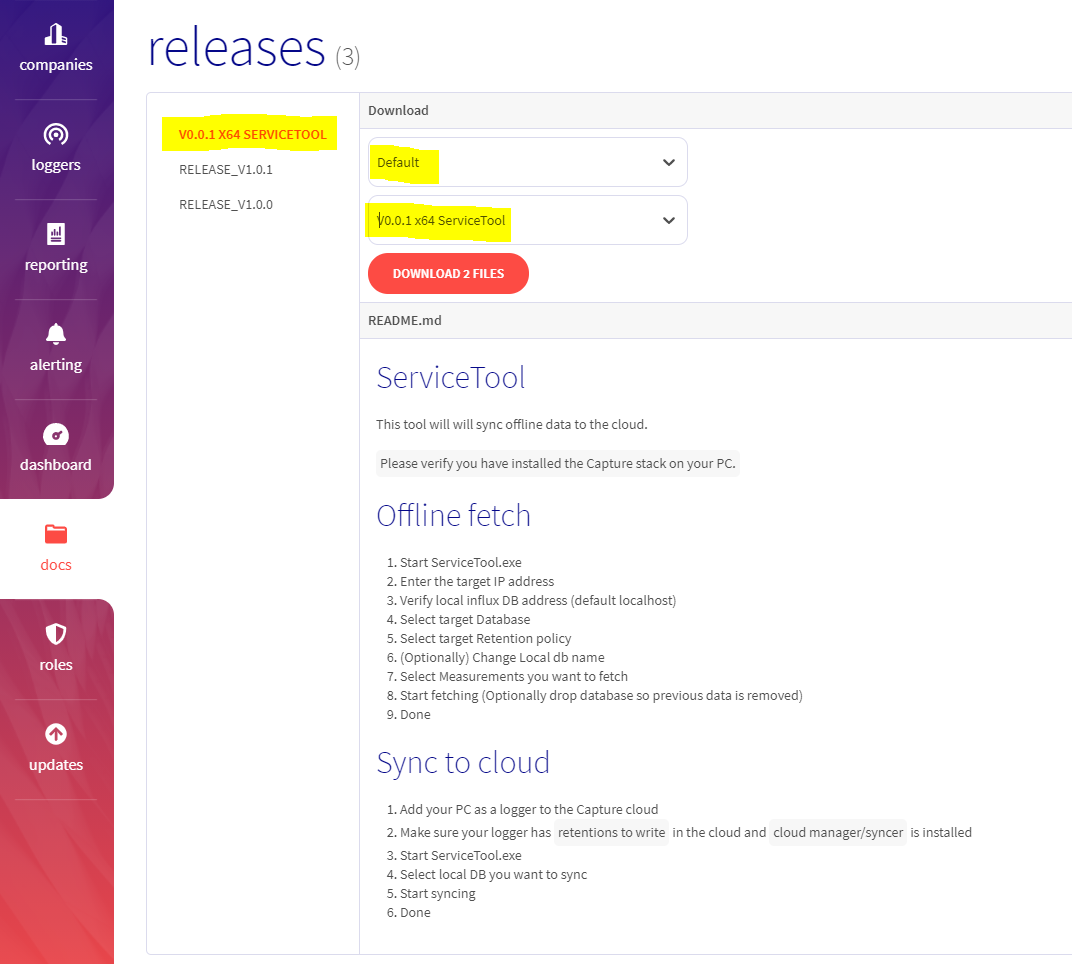 If you run the installer without the configuration file, the logger will start the provisioning flow with the Vintecc company. (This is the default config) If you want the logger to start the provisioning flow with your company, a Config.json file with your company name in the <YourCompanyName> placeholder is needed.
"CloudManagerSettings": { "UpdaterEndpoint": "https://capture-vintecc.com/Updater", "ProvisioningEndpoint": "https://capture-vintecc.com/Provisioning", "AuthEndpoint": "https://capture-vintecc.com/Auth", "Company": "", "CloudIdTag": "", "ConfigRefresh": 30000 }
After you added the default config for your company to the installation folder, you are ready to run the installer. The config file next to the installer exe should be named Config.json ! To install the tool, execute the installer and follow the installation steps.
First Run
When running the service tool for the first time, you have to register the tool in the cloud. In this registration process you attach the tool to a company and add a target cloud database/retention policy. After the registration, a license is sent to the tool. When a tool is licensed, he is able to sync data to the cloud.
Provisioning
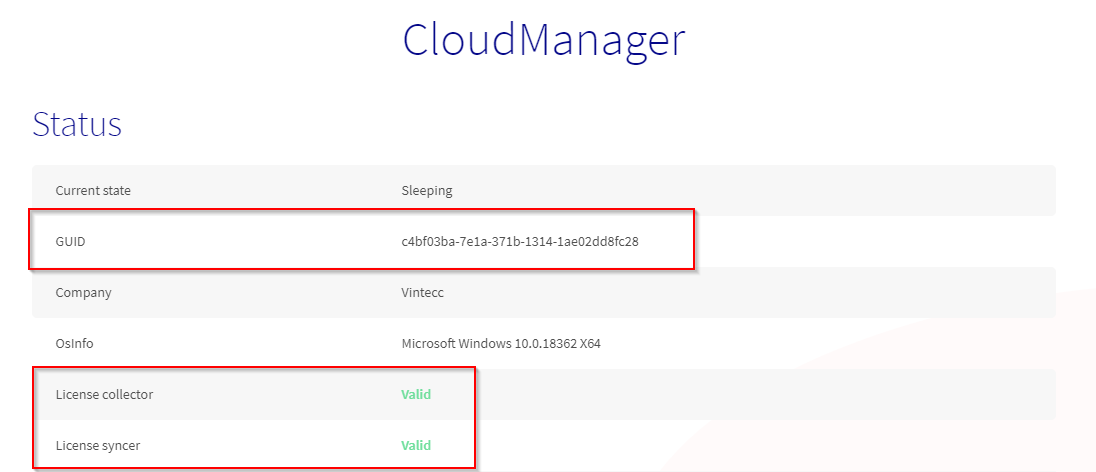
check if the cloudmanager service is running via http://localhost:5004/api/ui (firefox or chrome) Licenses should be invalid for the moment. On this page, you can find the GUID used for provisioning with the cloud. (Screensot after provisioning)
Browse to capture-vintecc.com and login with your admin user
Go to Loggers > overview and click on the Add logger online button
Here you see a list with all provisioning loggers for your company. Select the logger with the matching GUID.
 5. Name the tool, select the company, Config must be empty and add retention(s) to write.
 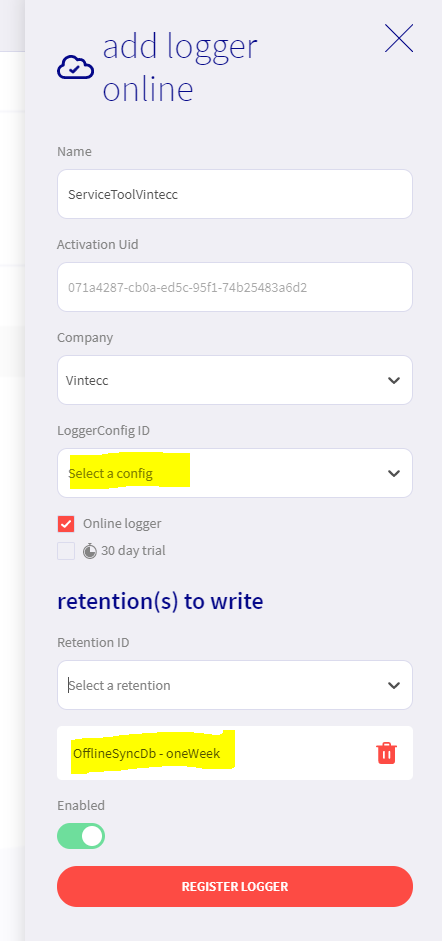 After executing these steps, the tool is created in the cloud. A license will be generated, which the cloud manager on the service pc will receive. This results in the licences being valid.


Target requirements
Capture release > V1.0.1
To be able to take a remote backup, you need to temporarily allow incoming tcp connections on port 8086 & 8088 in the target firewall.
Capture release <= V1.0.1
To be able to take a remote backup:
- You need to temporarily allow incoming tcp connections on port 8086 & 8088 in the target firewall
- Make following changes in the influxdb config file of the target machine
- Stop the influx service on the target machine<.li>
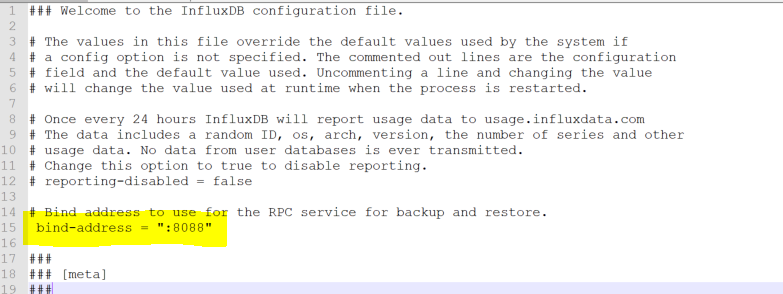
- Open C:\Program Files (x86)\Capture\Influx\influxdb.config
- Uncomment and change # bind-address = "127.0.0.1:8088" to bind-address = ":8088".
- Start the influx service
Fetch data from target
This is an overview of the architecture (red)
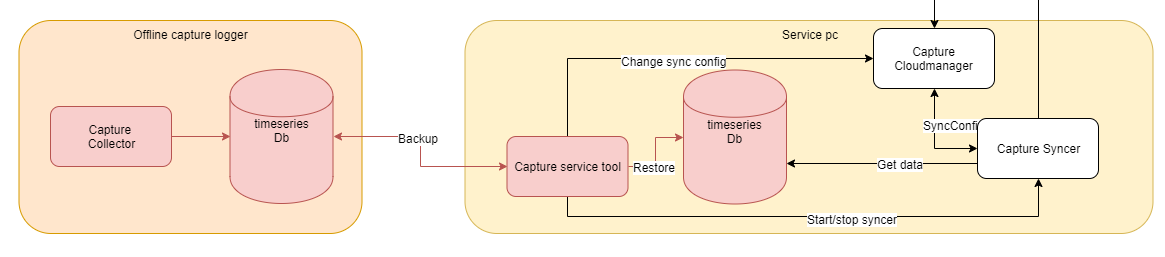
To fetch data from the target, open the service tool via the desktop icon or <installation path>/CaptureServiceTool.exe . Following screen will appear:
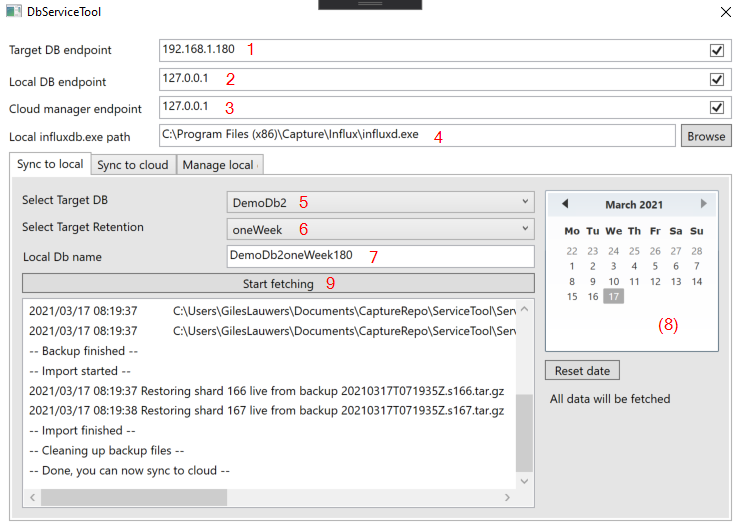
| 1 | Targt Db enpoint | Ip-address of the target machine (offline logger) |
| 2 | Local Db endpoint | Ip-address of the destination db => 127.0.0.1 is your own pc |
| 3 | Cloudmanager endpoint | Ip-address of the cloudmanager => typically equal to local db endpoint |
| 4 | Local influxdb.exe path | Path to influxd.exe (influx installation folder) |
| 5 | Target DB | Select the target (remote) DB you want to sync to your own pc |
| 6 | Target retention | Select the retention policy of the target DB |
| 7 | Local DB name | Proposal for the db name on your pc => default: <target DB name><Retention><Last part of target IP> Duplicate db names will be overwritten |
| 8 | (optional) time range | Select the time range of the backup => slide over the days to select multiple days (Default all data) |
| 9 | Start fetching | Start the backup/restore process |
Send data to cloud
Below is an overview of the architecture (red)
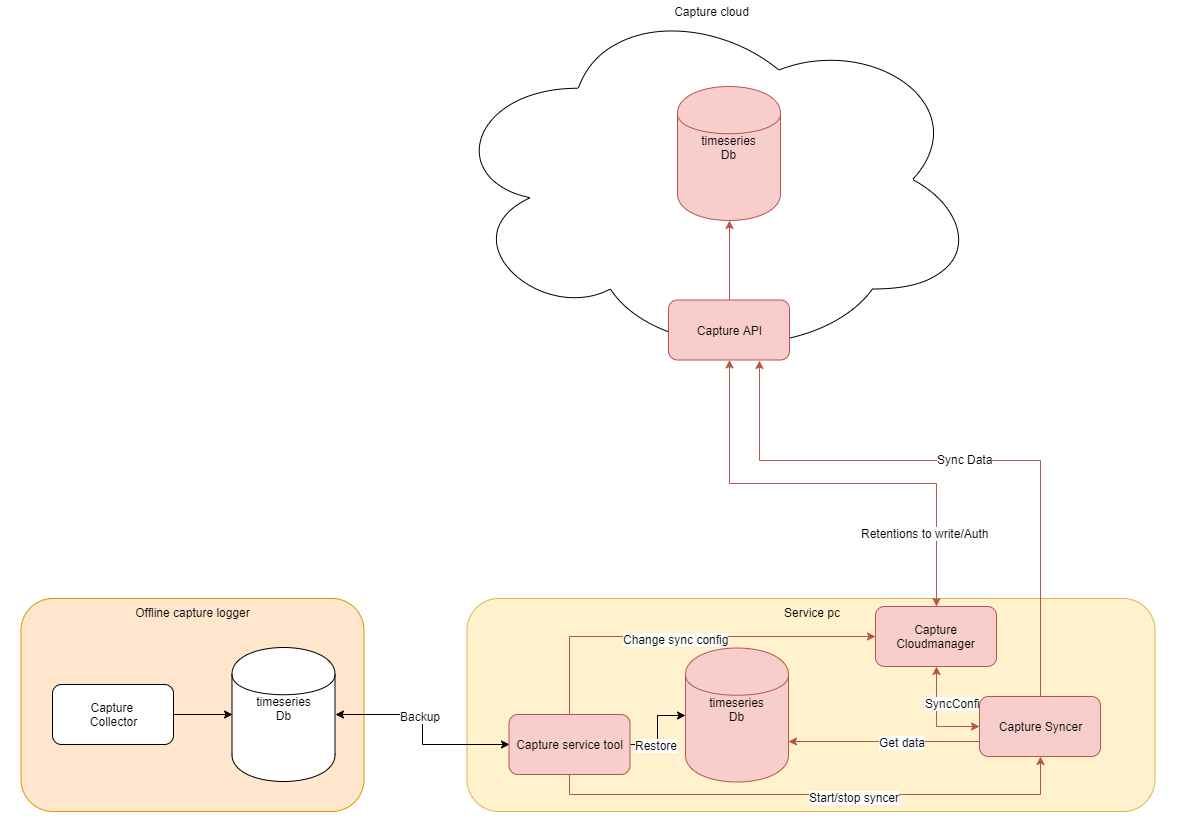
To sync the data to a cloud database, you first need to verify the Retentions to write of your service tool logger in the cloud. Here you can specify to which cloud database(s)/retention(s) the data will be synced.
Always check if this is correct before syncing your data!
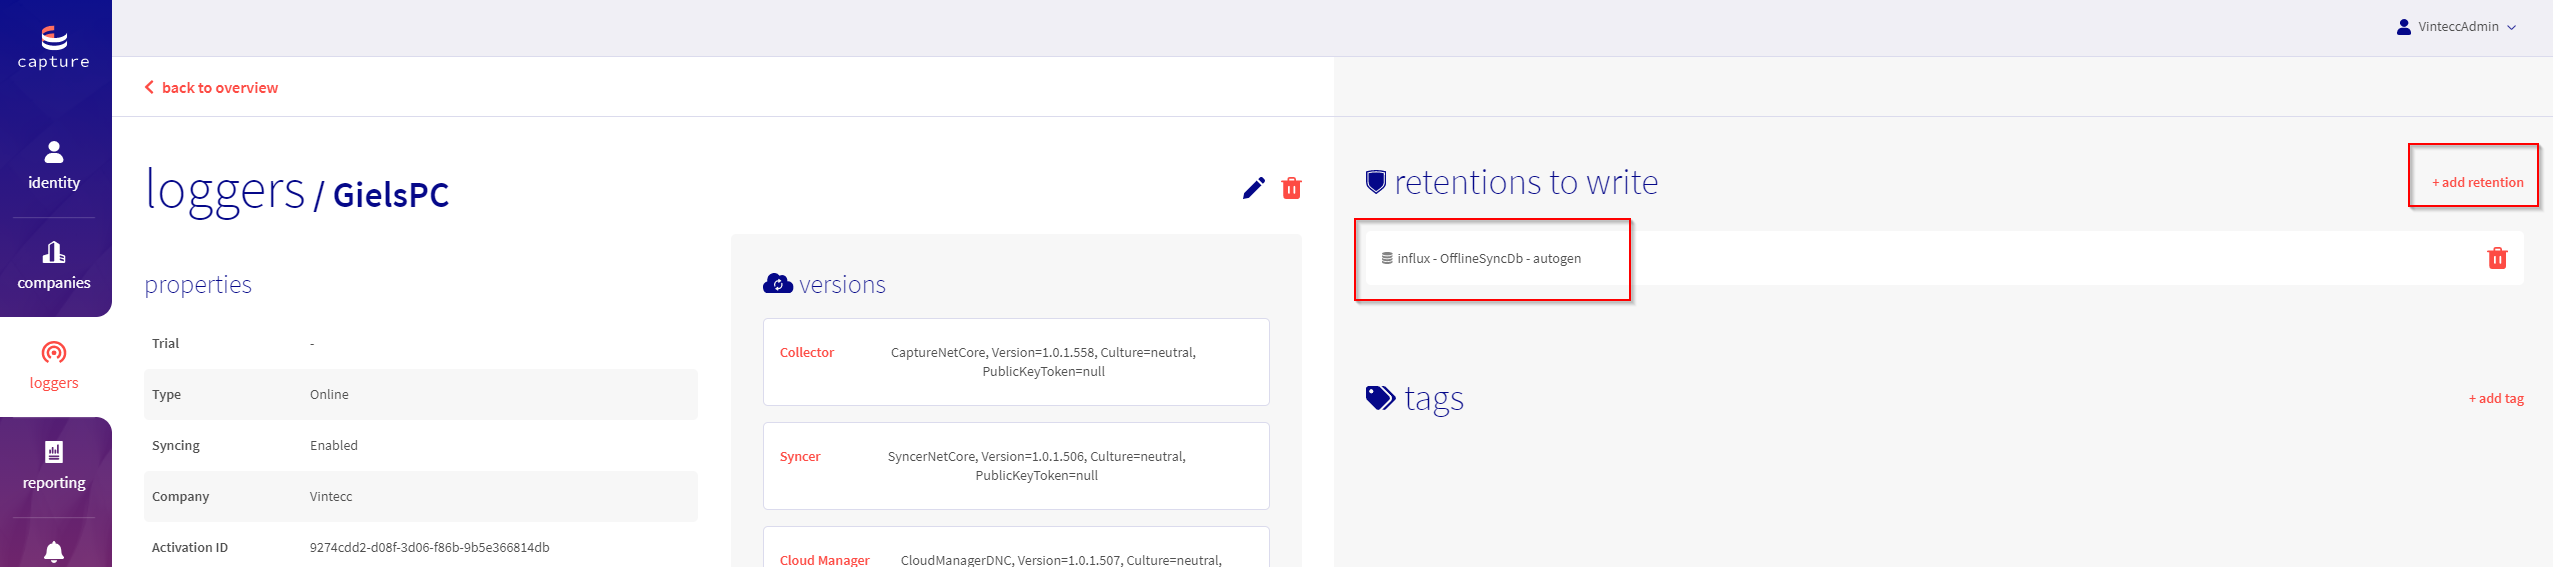
After validating the retentions to write, open the Capture service tool and select the Sync to cloud tab.
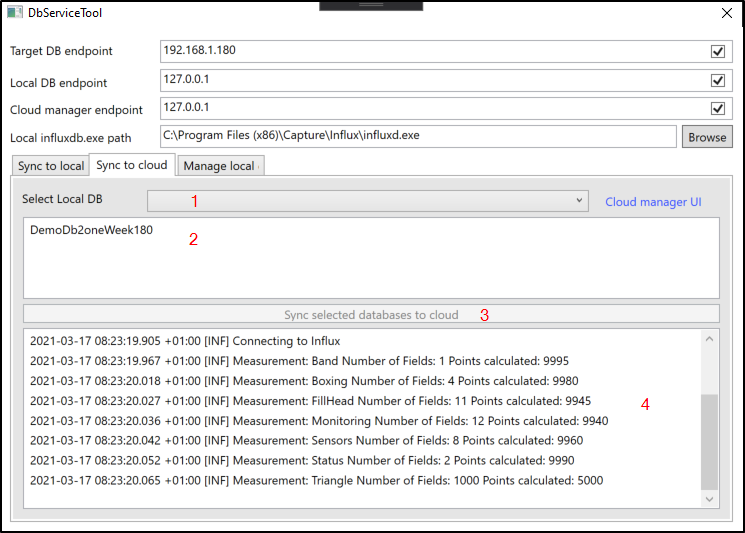
| 1 | Select local DB(s) | Select the local db(s) that you want to sync to the cloud |
| 2 | Selection overview | Overview of the selected local db(s) => delete a selected db by clicking on the db |
| 3 | Start Syncing | Start the Capture syncing service to sync the selected databases to the retention to write cloud database(s) |
| 4 | Capture syncer logs | Logs of the syncer app, wait until syncing is done this can take a while... |
Manage local databases
After syncing the databases to the cloud, you can delete the local databases with this tab.
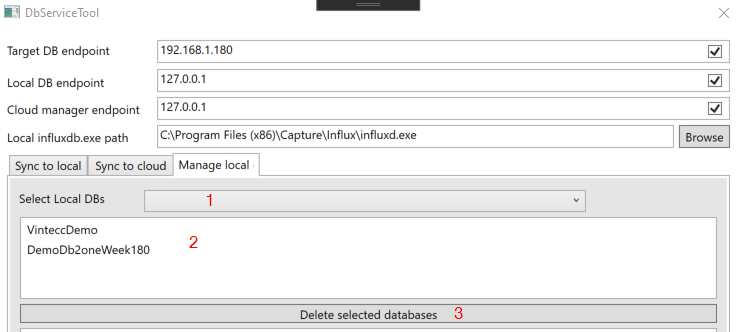
| 1 | Local db | Select the local db(s) that you want to delete |
| 2 | Selection overview | Overview of the selected local db(s) => delete a selected db by clicking on the db |
| 3 | Delete selected db(s) | Delete all the selected databases from your local database (service pc) |